I Upscaled 6 Real Images. Here Is When AI Upscaling Actually Helps
A practical AI image upscaler workflow using real product photos, old scans, pixel art, anime posters, and low-light frames, with checks for when to upscale and when to regenerate.

Sarah Thompson
·5 min read

A tiny image is not automatically a bad image. The real question is whether it still contains enough structure for an upscaler to recover.
I tested six real files in GPTIMG in May 2026: a product shot, a vintage portrait, pixel art, an old family photo, a low-light security still, and an anime poster wall. The useful results had one thing in common: the original already had a clear subject, even when it was small or compressed.
TL;DR: upscale when the image has a clear subject and missing resolution. Regenerate when the composition, anatomy, text, or product shape is already wrong.

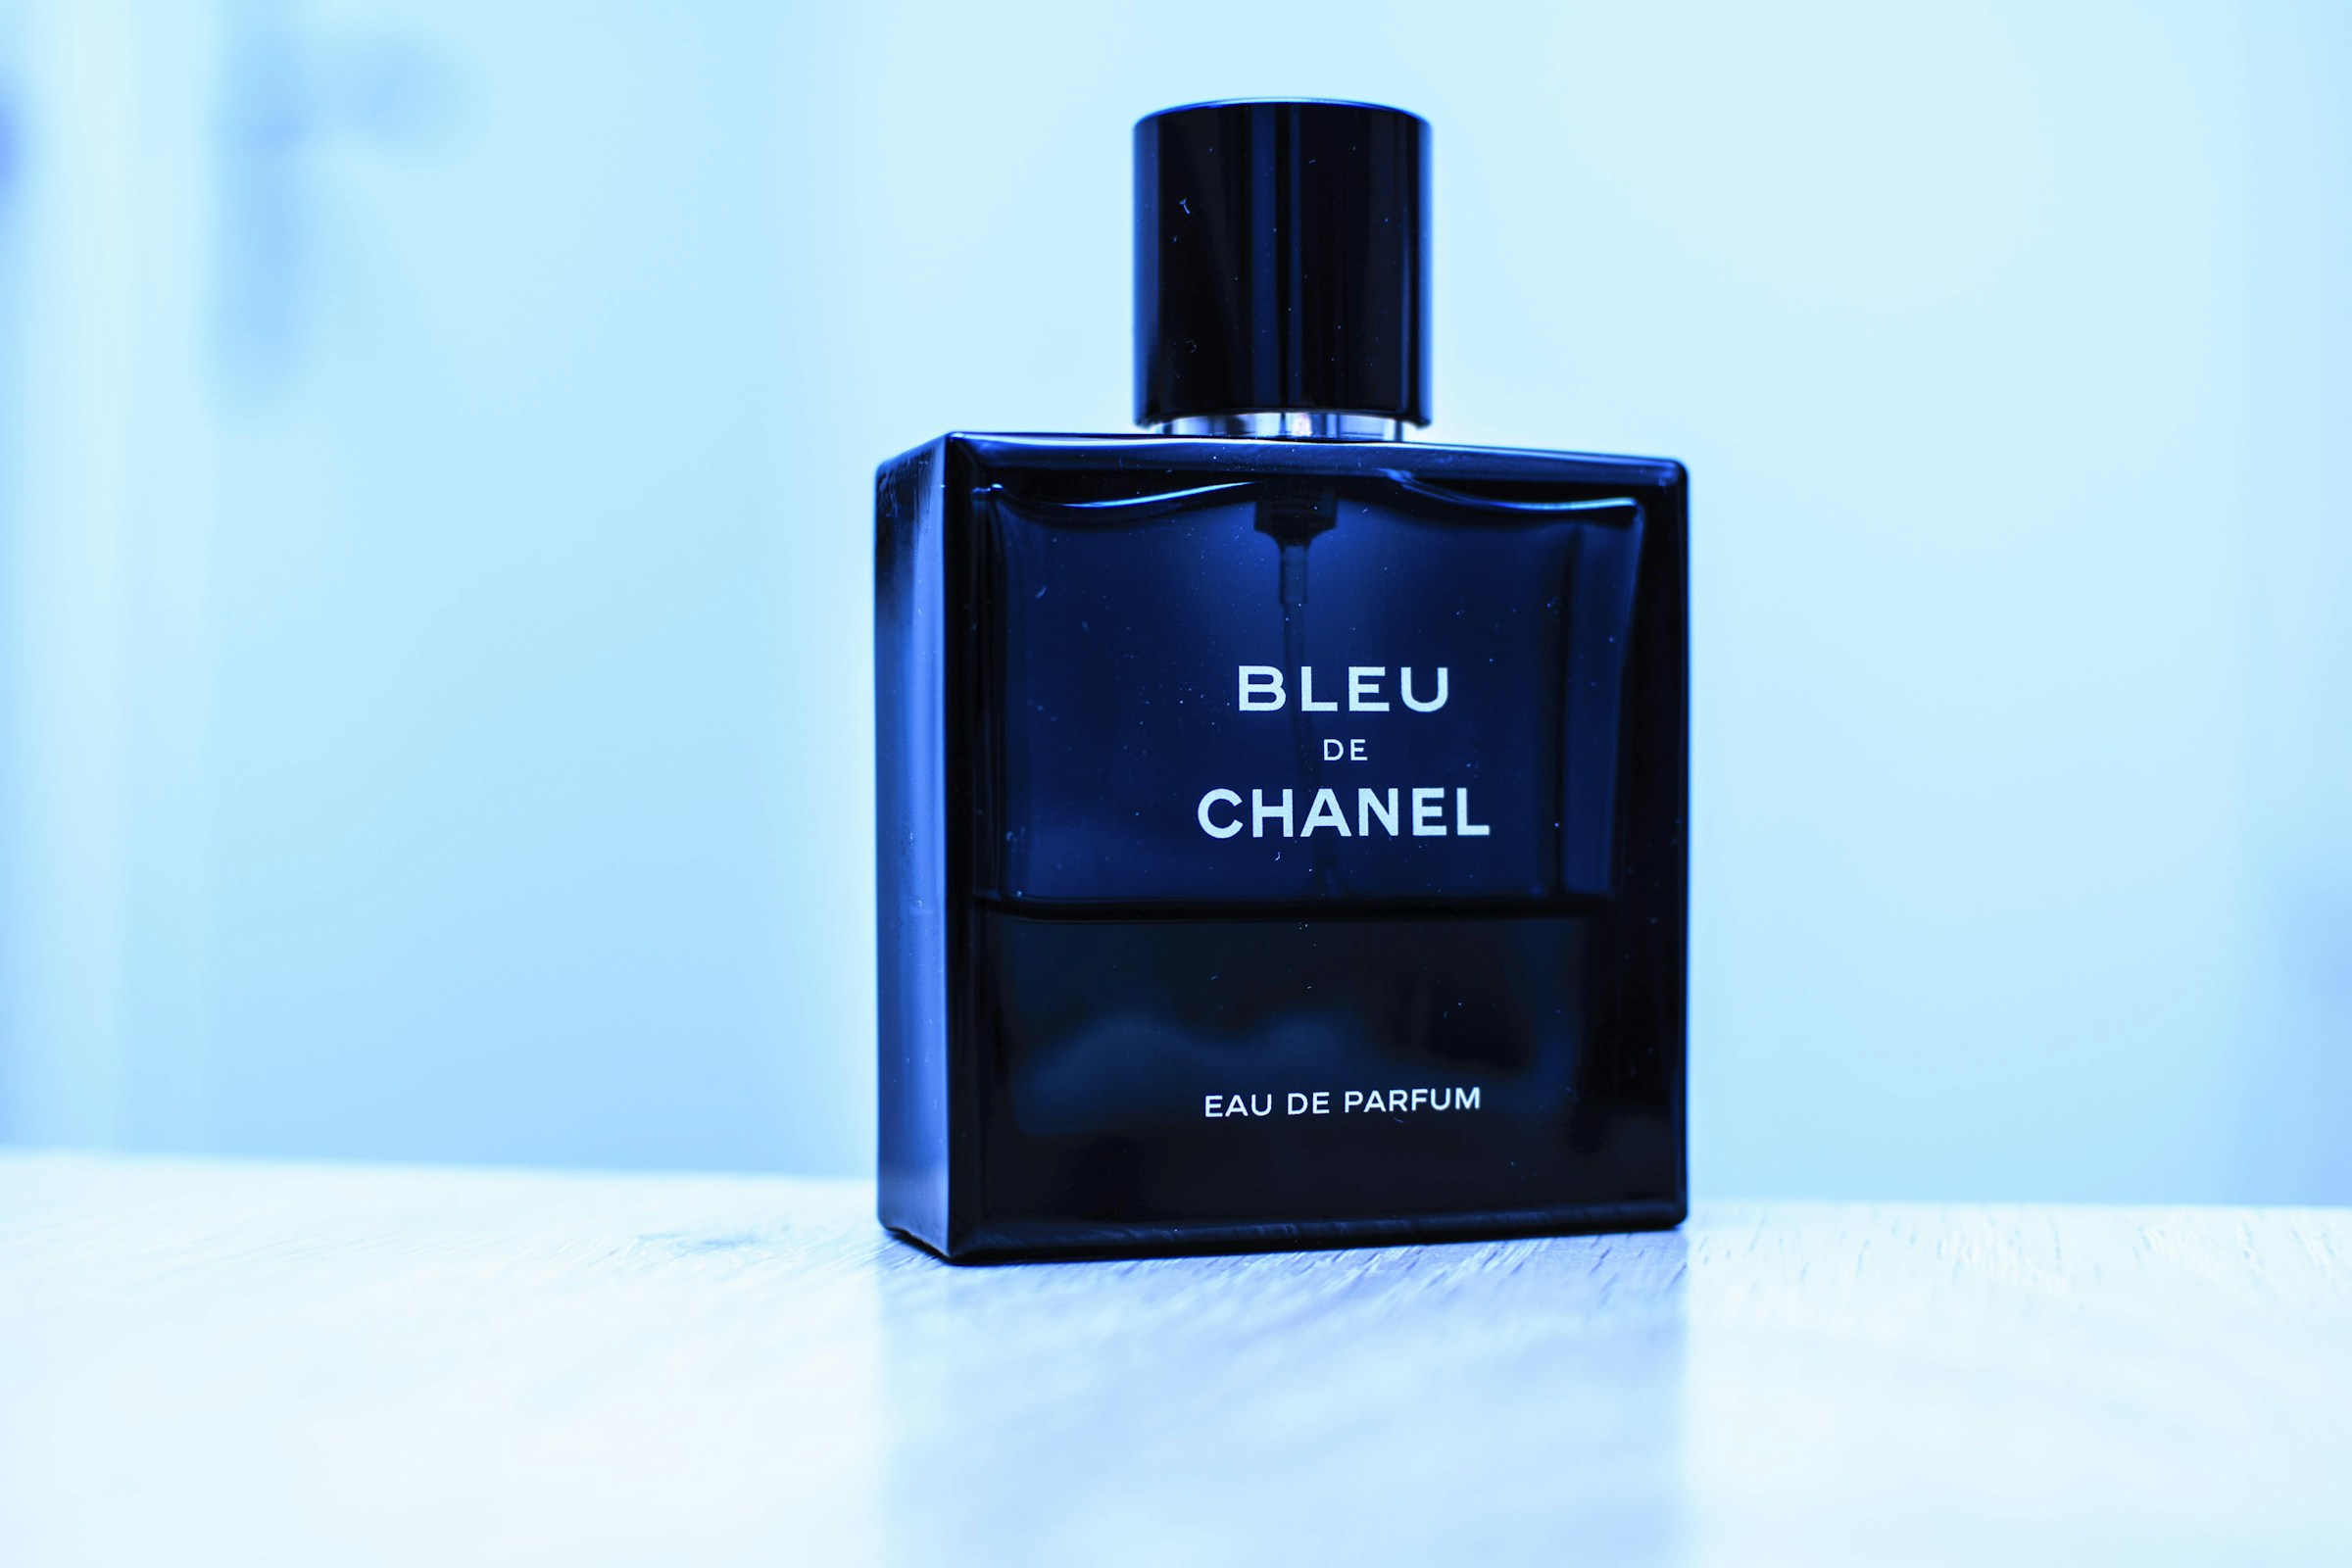
The cases that improved
The strongest example was the perfume bottle. The source was small, but the bottle silhouette, cap, glass highlight, and table shadow were readable. After upscaling, it became usable for a Shopify product block, a landing page hero, or a small ad crop.
The second useful case was the sepia portrait. Old scans often have faces and clothing detail that are soft but still present. Upscaling helped the faces, hats, and fabric edges without turning the image into a different scene.
Pixel art behaved differently. The goal was not photographic realism. The goal was to keep the blocky look while giving the file enough resolution for a poster or print preview. That is why checking the result at 100% matters more than judging it from a thumbnail.
Here is the simple rule I use before pressing upscale:
- Subject is clear: I can describe the main object in one sentence.
- Edges are present: the outline is soft, not destroyed.
- No broken text: labels, logos, or typography are not already nonsense.
- Composition is worth keeping: I would still use the crop if it were sharper.
If one of those fails, I usually regenerate instead.
The 10-minute workflow
Start with one image, not a batch. Batch work is faster only after you know the settings work for that visual style.
- Upload the smallest file you actually want to keep. Give it one pass at 2x before jumping to 4x.
- Check three areas: eyes or product edges, small text or labels, and shadow transitions.
- If the output looks right, download it and run a lighter export through Compress image.
- If the subject needs a cleaner background, move the same image into Remove background.
- If only one mark is distracting, use Remove object before the final export.
This is where most people lose time: they upscale a bad image three times instead of fixing the reason it looks bad.
Try the same upscaling workflow
Upload one small product photo, AI render, poster, or old scan. Inspect the result before you commit to the full finishing path.
What not to upscale
Do not use upscaling to hide a wrong product. If the chair leg is missing, a bottle label is invented, or a face has odd geometry, the larger version only makes the problem easier to see.
Do not judge from a social preview. Open the file at full size. Product images fail at edges: handles, transparent glass, jewelry chains, shoe soles, hair, and labels.
Do not skip compression. A 2400 px image is often too heavy for a page if you export it carelessly. The final step should be lighter, not just larger.
The finishing path that feels natural
A good image rarely needs only one action. The practical path is usually:
| Starting problem | Best next move |
|---|---|
| Small but useful product photo | Upscale, then compress |
| Good subject with messy background | Remove background, then upscale |
| Strong image with one distracting mark | Remove object, then upscale |
| Finished image is too heavy | Compress image |
The point is not to make a bigger file. The point is to make a file you can actually ship.
If you have one small image open right now, start with the upscaler. If the subject survives the first pass, keep moving through the finishing tools until it is ready for the page, post, or deck.
Frequently asked questions
Do I need a credit card to try GPT Image2 Studio?
No. Every new account starts with 30 credits on signup, then unlocks 30 more after the first successful image. Paid plans only kick in if you want more than the free ceiling.
Can I use the generated images commercially?
Yes. Every tier, including the free starter credits, comes with full commercial rights. Run ads, sell products, print on merchandise, publish on any platform. No watermark, no attribution required.
Which model should I route to for what?
Hero ads and text-heavy creative fit GPT Image 1.5 high. Product and macro texture work fit Nano Banana Pro. High-volume social iteration fits Nano Banana 2. Fast drafts and mood boards fit Z Image. The workbench can route one prompt across all of them.
How fast is a single generation?
Z Image returns in about 10 seconds. Nano Banana 2 often returns in 15 to 20 seconds. Nano Banana Pro and GPT Image 1.5 high usually take 30 to 45 seconds for standard quality, and up to about a minute for 4K high quality.
What's the difference between GPT Image 1.5 high and Nano Banana 2?
GPT Image 1.5 high is stronger for text inside images and premium ad creative. Nano Banana 2 is faster and cheaper. In production, compare both with the same prompt before choosing the final image.
Can I edit an existing image instead of generating from scratch?
Yes. Upload a reference image, then continue with image-to-image, masked edits, background removal, object cleanup, or compression inside the same workflow.
Stop guessing the model.
Run all three.
We route your prompt to GPT Image 1.5 high, Nano Banana 2, Z Image and more — same workbench, same prompt, side-by-side blind compare. 30 credits on signup, another 30 after your first successful image, and commercial rights at every tier.
30 + 30
Free credits
5+
SOTA models
30s
To first render


